TABERNACLE MODEL PAINTING GUIDE
A painted Tabernacle set adds life and realism to the display. Here we've put together some pointers to help you with the painting and the assembly of the model.
We've also provided some scriptural references to the different colours used in the Tabernacle, so be sure to look them up as needed.
The assembly of the Tabernacle model can also be a great complement to the free Sunday School lessons on the Tabernacle.
Follow the guide below or download a copy for your reference.
What is the Tabernacle of Moses?
- Diagrams of the Tabernacle and Basic Layout
- The Gate
- The Brazen Altar
- The Laver
- The Menorah
- The Table of Showbread
- The Golden Altar of Incense
- The Ark of the Covenant and Atonement Cover
Why Study the Tabernacle of Moses?
Why the Jewish Old Testament Tabernacle?
Sunday School Lessons on the Tabernacle
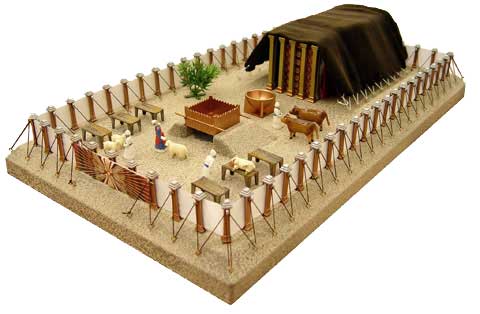
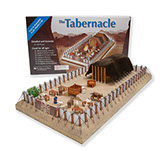
Purchase a Tabernacle Model Kit
A great visual aid for teaching about the tabernacle with adults and children.
1. TOOLS YOU NEED

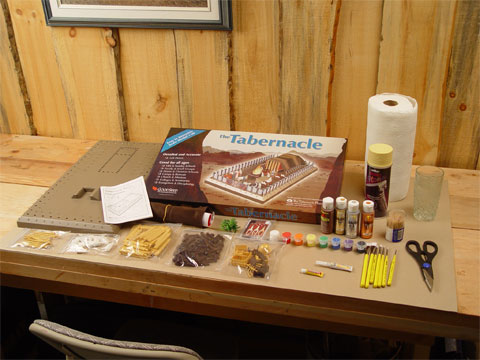
In order to build a nicely painted Tabernacle model, you must finish painting all the parts before you assemble the pieces. These are the tools we recommend:
• Acrylic paint (bottles) in:
- gold
- silver
- bronze
- brown (4 colours)
OR you could substitute the gold and bronze with spray paint instead of acrylic paint. The spray paint is more expensive, but much faster to paint (especially if you're making more than one set). The bronze acrylic paint will still be needed in addition to the spray paint.
• Acrylic paint set of the rainbow colours, black and white (8 colours)
• Paint brushes in various sizes
• Texture Spray (Fleck Stone Spray) — 1 can
• A pair of scissors
• Superglue
• Toothpicks
• Glass of water (for washing paint brushes)
• Some paper towels
• Cardboard as a working surface
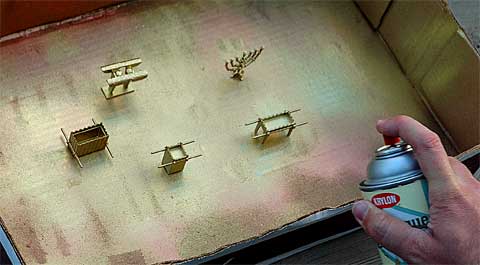
2. SPRAY THE BASE
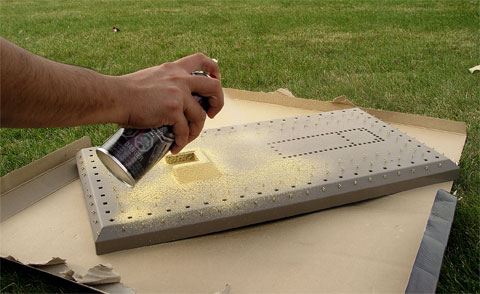
To achieve a desert-like feel for the base, use the texture spray.
First, find a place with good ventilation (outdoors is best, weather permitting).
Apply a layer of texture on the top surface and the four sides of the base. Spray on enough to cover most of the plastic, but be careful not to over apply. Use a toothpick to remove any excess paint in the holes in order to avoid later problems.
Let it dry completely. This may take several hours.
Depending on the spray, you may need to apply a second layer after the first has dried.
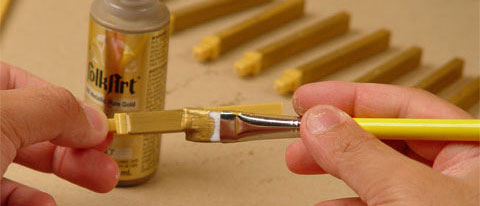
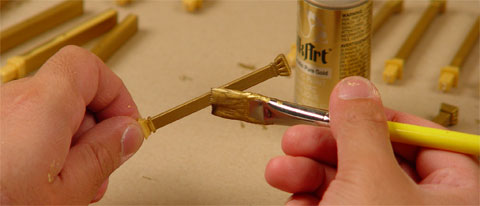
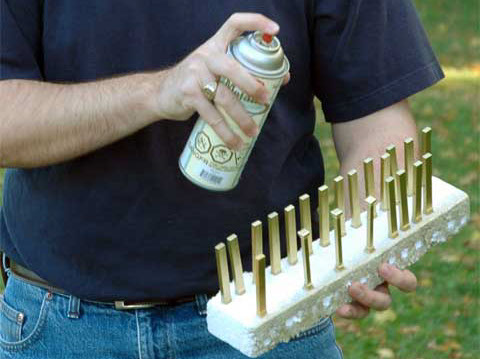
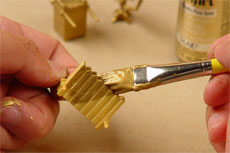
3. PAINT THE COURTYARD POSTS
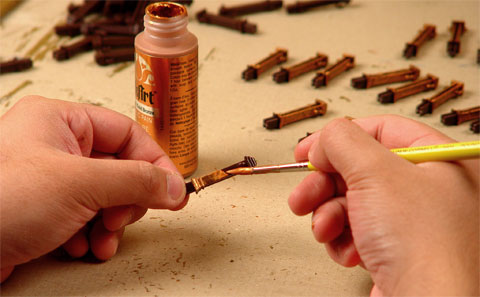
Paint the courtyard posts according to the colours stated in Exodus 27:17; 38:10, 11.
Courtyard post: silver top and hooks with bronze base.
Paint the bronze base first and let it dry. Then paint the silver top and hooks.
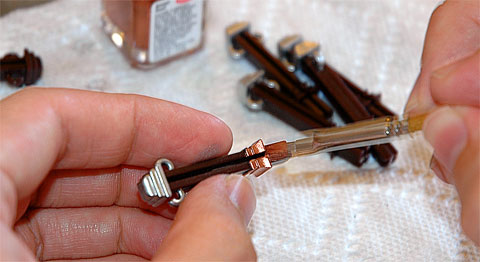
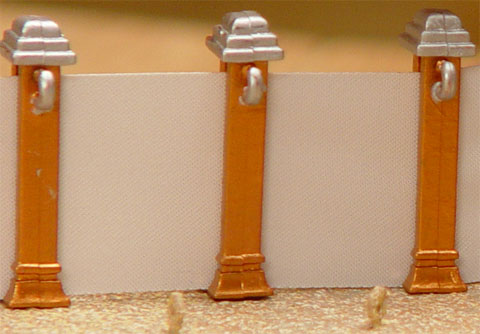
Depending on your interpretation of the passage, the bronze base can either include the whole post or just the base.
The finished posts should look like one of the images below.
4. PAINT THE TABERNACLE FRAME
Paint the Tabernacle frame according to the colours stated in Exodus 26:15-29; 36:20-34.
Tabernacle frame: gold with silver base.
Paint the gold first and let it dry before painting the silver bases.
5. PAINT THE TABERNACLE CURTAIN PILLARS
Paint the Tabernacle curtain pillars following the colours stated in Exodus 26:32,37; 36:36,38.
Tabernacle curtain pillars: gold with base of bronze (five pillars) or silver (four pillars).
Paint the gold first and let it dry before applying the gold or silver base.
As an alternative to using a paint brush, you could spray paint.
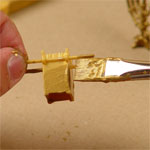
6. PAINT THE BRONZE ALTAR AND THE BASIN

Paint both the bronze altar and the basin (including its stand) bronze.
It may take a few layers. Apply each layer after the previous has dried.
For effect, you can also paint the centre grate of the altar with some black paint to represent the ashes from the burnt offerings.
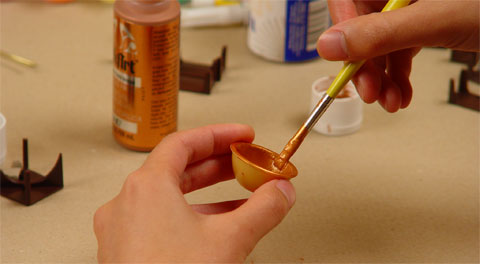

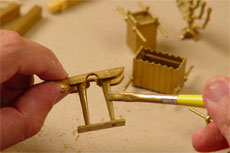
7. PAINT THE TABLES IN THE COURTYARD
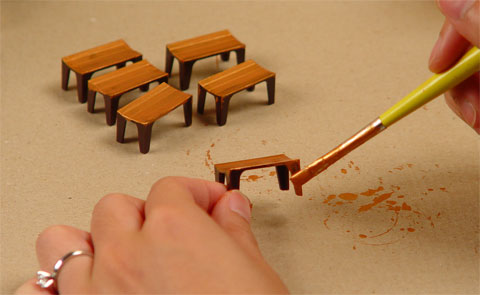
Tables in the courtyard. Although the tables are not specifically mentioned in the Bible, the Bible does say that "all the other articles used in the service of the tabernacle, whatever their function... are to be of bronze" (Exodus 27:19 NIV).
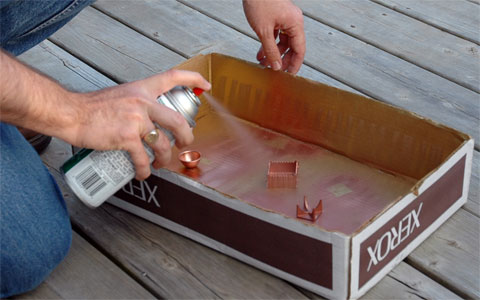
You could also use bronze spray paint for the furniture instead of a paint brush.
8. PAINT THE FURNITURE IN THE TENT OF MEETING
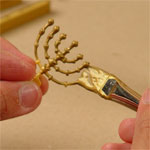

Refer to Exodus 25:10-40; 30:1-10 for details on the furniture in the Tent of Meeting.
For all the furniture in the Tabernacle compound, paint gold: the lampstand, the table with the bread, the altar of incense, the Ark of the Covenant and the atonement cover.
Paint the two loaves of bread with a mixed brown and white paint.
Paint the jar of manna gold (Hebrews 9:4).
Aaron's staff can be painted brown.
The two stone tablets can be painted grey.
Again, these can be spray-painted as well.
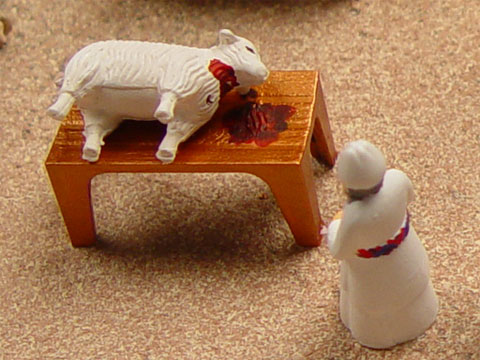
9. PAINT THE SACRIFICIAL ANIMALS
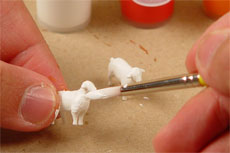
Paint the sheep white or tan. You can create a tan colour by mixing white and brown or yellow paint.
We recommend that you paint the sheep white even though the original colour is already white. This is because the paint gives it a more realistic texture versus the plastic rubbery feel.
You can also paint the faces and the legs of the sheep black or tan.
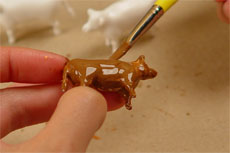
Paint the cows brown. Use a toothpick or an ultra-fine brush to paint the eyes black.
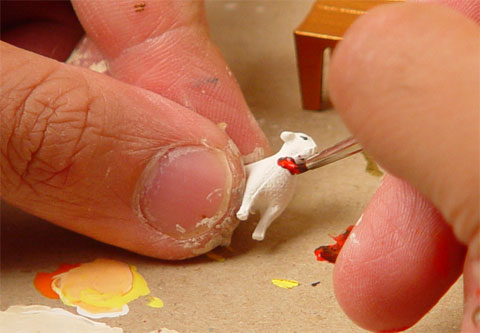
For a more realistic depiction of the sacrificial system, mix red paint with some black and apply it to a sheep across the front of its neck. Then paint the same "blood" on the table it's resting upon.
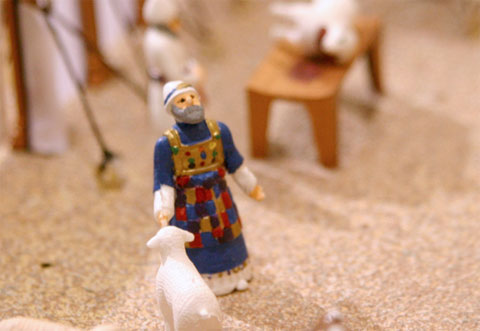
10. PAINT THE PRIESTS

Details on the priests are covered in Exodus 39:27-29.
First, prepare the skin colour by mixing yellow, orange and white paint together. Paint the faces and the hands of all the priests, including the high priest.
Then paint the sashes with red, purple and blue paint (Exodus 39:29).
If you don't have an ultra-fine brush, it might be easier to use a toothpick to colour in the details.
After the paint has dried, paint the priests with white caps and white robes. The white paint gives them a more realistic texture versus the plastic look.
After the white paint has dried, paint the eyes black and the beards grey or black. You may also choose to leave the beard white.
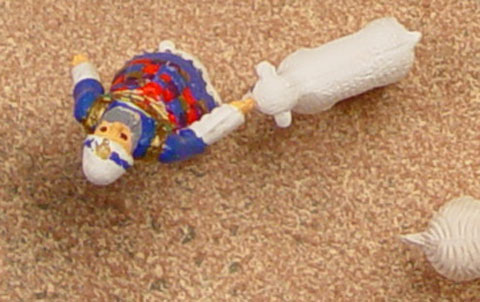
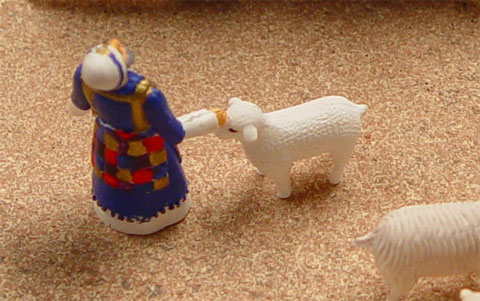
11. PAINT THE HIGH PRIEST
The high priest may take the most time to paint. If this is your first time, it may take you a few hours.
Start by painting the squares on the ephod with alternating red, purple, blue and gold paint, as well as the pattern of the waistband (Exodus 28:6-8).
Then paint the breastpiece with gold first, including the two cords that go over his shoulders.
After the breastpiece has dried, paint four rows of dots with three stones in each row in the following colours (Exodus 28:17-20):
red yellow green
bluish green blue white
red white purple
bluish green black brown
These colours represent the gems:
ruby topaz emerald
turquoise sapphire diamond
jacinth agate amethyst
beryl onyx jasper
Paint the circle of the cord on each shoulder with onyx (blackish) colour (Exodus 28:9-12).
Then paint the bottom half of the ephod (below the squares but above the dots) with blue. Paint the upper sleeves on both arms blue as well (Exodus 28:31).
Paint the lower sleeves of the tunic white (Exodus 28:39; 39:27-28).
Paint the dots which are the bells and pomegranates, with alternating gold and red (Exodus 28:34).
Finally, paint the cord blue and put a gold circle on his forehead (Exodus 28:36-38).
Optional: With all the painting done, you may choose to coat an acrylic varnish on the rubber figures (priests, sheep, cows, Aaron's staff, etc.) to better protect the paint.
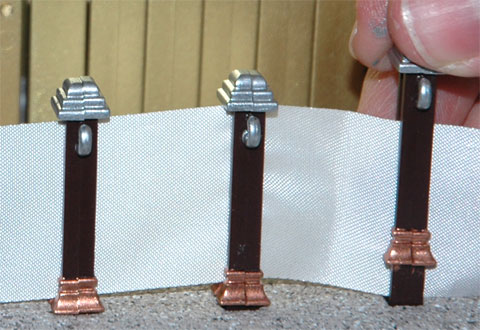
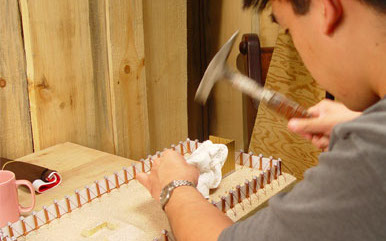
12. ASSEMBLE THE OUTER FENCE AND CURTAIN
Exodus 27:9-15 discusses the assembly of the outer courtyard fence and curtain.
First, insert all the outer posts with the curtain into the base. Make sure all the posts are fully inserted.
For purposes of illustration, note that the second picture below shows a corner post that is not fully inserted. You will need all the posts completely flushed against the base, illustrated by the side posts.
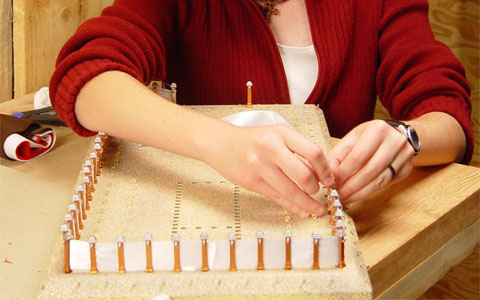
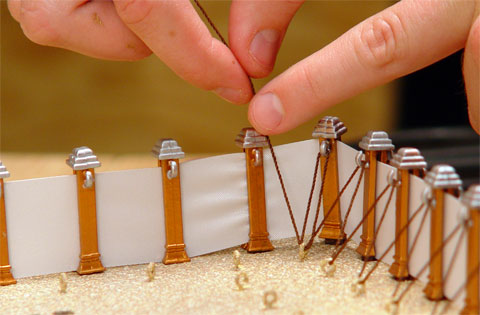
After putting the posts in, secure the brown strings around the hooks on the bottom and the hooks on the post.
You can start stringing either outside of the fence or inside of the fence.
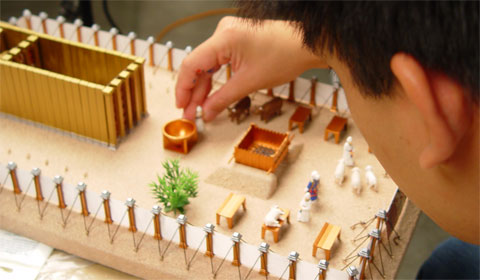
13. ASSEMBLE THE FRAMES AND THE INDOOR FURNITURE
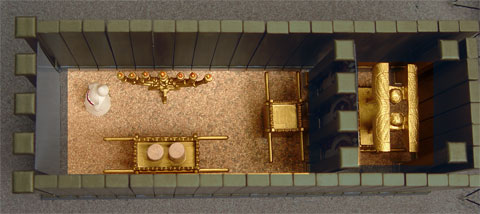
Following details in Exodus 40:20-30, put the furniture pieces in their respective places as shown in the picture.
If you would like to glue the objects onto the base, superglue them down before installing the building frames for the Tent of Meeting.
Gluing them makes it easier to hold up and use while teaching.
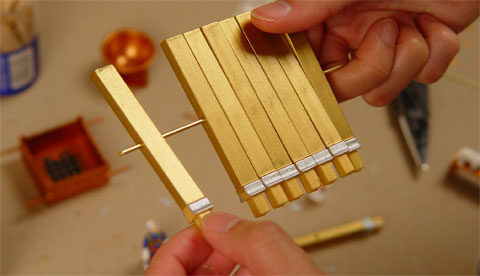

Put the frames around the Tent of Meeting by first inserting the metal poles through it. Six frames on the short side, and twenty frames for both of the long sides.
After that, put the frames into the holes. The frames fit in more tightly than the outer posts, so it may require a hammer to secure them.
If you are using a hammer, place a thick paper towel or cloth on top of the frames so paint does not chip off as you hammer the frames in.
Be sure to put a block of wood or a phone book beneath the base when you push down the frames. This support will make it easier to secure the frames while preventing the base from warping.
14. THE FINISHING TOUCHES
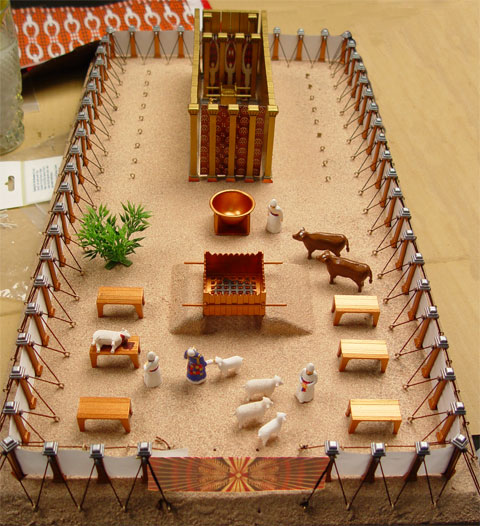
Add the curtain pillars to the Tent of the Meeting. The five pillars with bronze bases are to be at the entrance and the six pillars with silver bases are to be around the Holy of Holies.
The curtains may be glued to the top and the bottom of the pillars.
Next, place the bronze altar on the ramp and the basin in its stand, right between the entrance of the Tent of Meeting and the Bronze Altar.
You might choose to glue these pieces and all the other pieces, including the entrance gate, animals, priests, high priest, tables and the bush to the base.
The final piece is the cover for the Tent of Meeting. However, if you intend to teach with this, you might decide not to install the covers. This is because once covered and tied to the hooks, it would be difficult to remove to reveal the contents.
And there you would have it: a completed, painted Tabernacle model.
15. BEFORE AND AFTER

BOOKS & RESOURCES
The Stranger on the Road to Emmaus
All that the Prophets have Spoken
I WANT TO LEARN
ABOUT GOODSEED
The Monthly
GoodSeed eNewsletter
Sign up to receive articles, testimonies, sneak peeks of new resources & upcoming seminars. You'll receive a PDF copy of The Tabernacle: Model of Messiah as a thank you for partnering with us.
© 2023 GoodSeed International. All rights reserved.